Make this Red Velvet Cake with Cream Cheese Frosting as a birthday cake or special occasion. The 4 layers of red velvet buttermilk sponge work really well with the Vanilla Frosting which is less sweet than buttercream and is just as easy to make.

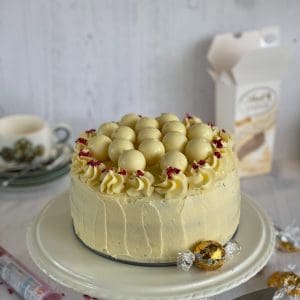
I made this as a birthday Red Velvet Cake for a little boy's 5th Birthday. It's what he asked for, how could I not make one. He also loved white chocolate truffles, so as a surprise I added a whole box of them as decoration, along with a few dried Raspberries for colour.
Jump to:
Why You Will Like This Recipe
- It's a lovely recipe for any occasion, as a birthday cake or anniversary.
- You can make the sponge ahead of time and decorate later.
- The Cream Cheese Frosting is less sweet than buttercream.
- You have the option of making this a two layered or four layered sponge cake.
Ingredients and Substitutions.
This is just an overview of the ingredients I used and why I may have used them. See the recipe card below for a full list of ingredients and quantities.
I have separated the list of ingredients for both the Red Velvet Cake and Cream Cheese Frosting. As an alternative to the frosting you could make a simple buttercream.
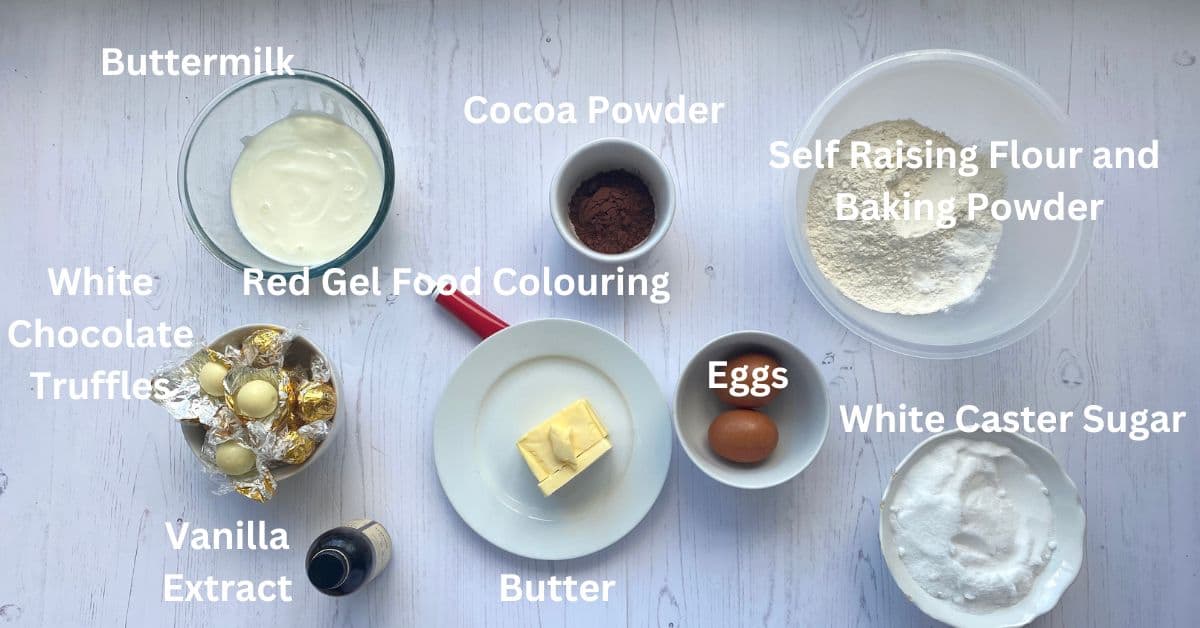
List of Ingredients for a Red Velvet Cake Sponge Batter.
- Flour: I used white self raising flour for this recipe.
- Baking powder: Even though I used Self Raising Flour, a little baking powder is often needed to help the sponge cake batter rise when it includes Buttermilk.
- Cocoa powder: Try not to add too much, as it could affect the red colour of the sponge.
- Buttermilk: A good buttermilk substitute would be full-fat plain yoghurt, although this is not something I have tried in this recipe.
- Red Food Colouring: Use strong gel food colouring. I used about 1 and half teaspoons so add more if you feel the colour isn't strong enough for you. TIP: The strength of the red colouring will also depend on the colour of the other ingredients eg. Cocoa Powder and how much of it you add.
- Unsalted Butter: I use butter as much as I can in all my baking, I love the taste. The fat content helps to carry flavour.
- Caster Sugar: Use white caster sugar as this will not interfere with the red colouring.
- Eggs: Wherever possible I used medium eggs rather than large ones. Much kinder to the chickens too.
- Vanilla Extract: Use the real thing. You can also try making your own. Avoid using Vanilla Essence, it's very artificial.
- Optional Decorations.
- Chocolate Truffles: I used White Chocolate Truffles to decorate the top of the cake, use a mix of different flavours if you wish.
- Freeze dried Raspberries: I used this to add a little colour to the outside of the cake giving an idea of what it may look like when sliced.
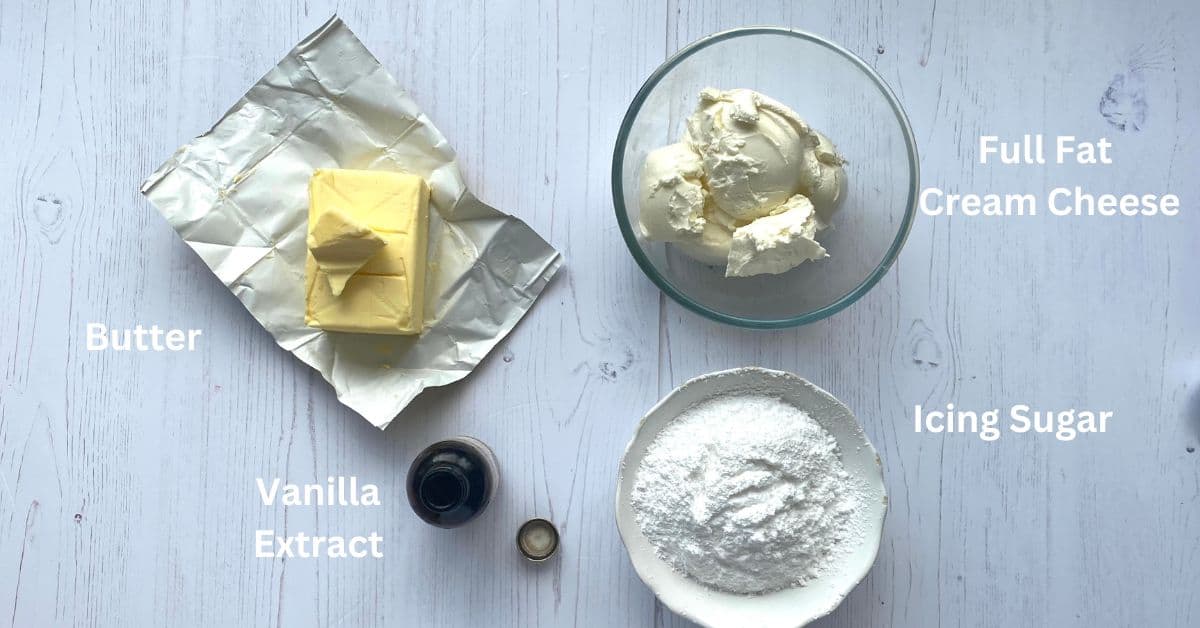
List of Ingredients for Cream Cheese Frosting.
- Butter: Unsalted and at room temperature. This is purely my preferred taste. TIP: If it isn't at room temperature, you will have lumps in the frosting as it will not mix well with the cream cheese.
- Icing sugar: Give it a good sieve before mixing it with the butter to avoid lumps in the frosting.
- Vanilla extract: Adds extra flavour to the cream cheese which can often have a sharp taste.
- Full fat cream cheese (at room temperature): Avoid using low fat cream cheese, it just doesn't seem to work for me. Make sure that the cream cheese and butter are both at room temperature as I find they mix together a lot better.
Step by Step Instructions
I've included quite a few step by step instructions with images for making this Red Velvet Cake recipe. Including easy to follow instructions for making Cream Cheese Frosting. It might help to read through them all before you begin baking.

Preheat the oven to 180 deg fan assisted. Grease and line two 20cm (8") round loose bottomed cake tins.

Step 1: Mix together the flour, baking powder and cocoa, then set aside.
Step 2: In a seperate bowl, combine the buttermilk with the red food colouring and mix thoroughly.
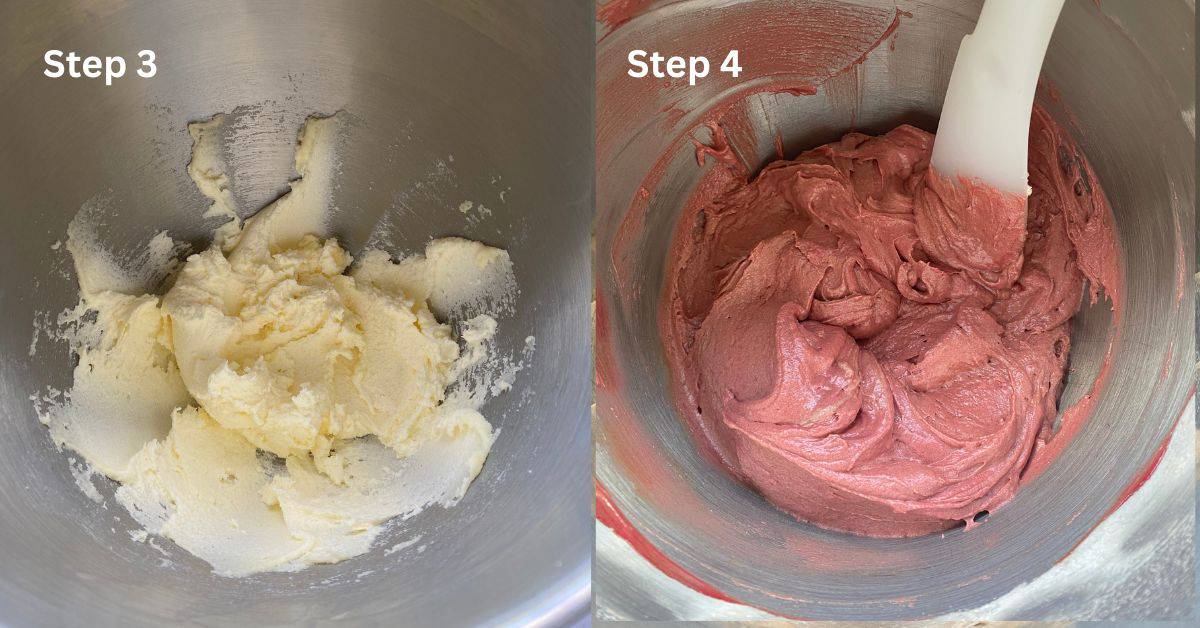
Step 3: Beat together the butter and sugar using a wooden spoon or electric mixer until light and fluffy.
Step 4: Gradually add the lightly beaten eggs, adding a little of the flour mix to help prevent curdling. Add the Vanilla extract, half the remaining flour mixture and half the red buttermilk and mix together.
Add the remaining flour and red buttermilk and beat until well combined. At this stage if the colour of the batter is not as deep a red as you would like, add more Gel colouring.

Step 5: Divide the mixture between the two tins and spread evenly.
Step 6: Bake in the centre of the oven for 25 – 30mins, or until baked testing the centre of each cake with a skewer until it comes out clean. Leave the cakes to cool for a few minutes before turning out onto a cake rack to cool completely.
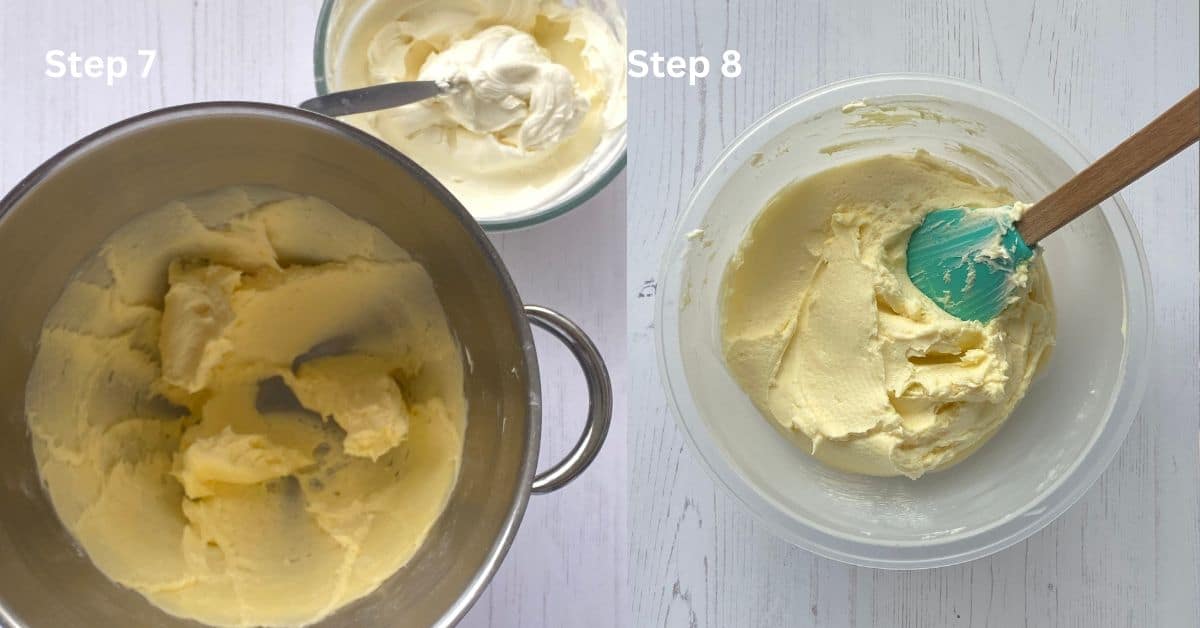
Step 7: While the sponge cakes are cooling, make the cream cheese frosting. Beat together the butter and icing sugar until light and fluffy, then add the vanilla extract. Mix until well combined.
Step 8: Very lightly mix the cream cheese to loosen it a little, then add to the butter icing mixture. Very gently mix until well combined. Once mixed, transfer to a smaller bowl if needed. Tip: Do not overbeat the frosting or it will separate and curdle. TIP: Give it the minimum of mixing once you have added in the cream cheese.

Step 9: Once the cakes have cooled completely, slice the two sponge cakes in half horizontally, creating four layers in total. Place one layer of sponge onto a plate and cover it with a layer of frosting. Top with the second sponge layer and cover this with frosting then repeat the process.
Step 10: Using a palette knife, crumb coat the sides and top of the cake with a thin layer of frosting. Leave to chill in the fridge for about an hour until firm and set

Adding the finishing touches. Remove the cake from the fridge, then cover the top and sides with more frosting, finishing with a smooth surface. Add some frosting to a piping bag with a rosette nozzle and decorate the top of the cake with swirls of frosting. Add the white chocolate truffles in the centre.
As an optional topping to give a hint of the colour inside, scatter with a few freeze dried Raspberries or Strawberries.
Storage
Room Temperature: Not ideal to keep the cake out at room temperature, see below.
Fridge: Because of the cream cheese frosting, this cake is best kept covered in the fridge, where it will keep for several days. The frosting could begin to crack if left uncovered. Tip: Keep a little extra frosting to one side just in case you need to fill in any cracks.
Freezer: Not suitable for freezing unless the make the sponge cakes ahead of time and freeze the sponge cakes without any frosting. The cream cheese frosting will probably split when thawed.
Baker's Tips
- Tip 1 - Use full fat cream cheese and do not overbeat the frosting as it could separate and split.
- Tip 2 - Use a large serrated knife to slice the cakes into 4 layers. Make sure they are completely cold before you do.
- Tip 3: Calculate how much frosting you will need to cover the sides and top of the cake before you begin to sandwich the sponge layers together. Not forgetting any additional decorating.
Frequently Asked Questions
Cream Cheese Frosting will harden in the fridge. It is especially good if your frosting is a little too soft to pipe.
It is very easy to over whip cream cheese frosting. It will end up being far too runny. As soon as you see all the ingredients come together, that is the time to stop mixing.
More Cake Recipes You May Like To Try
After making this recipe please let me know how you got on by leaving a comment below. Especially if you used alternative ingredients.
Recipe
Red Velvet Cake with Cream Cheese Frosting
Equipment
- 2 x 8" (20 cm) Loose bottomed cake tins
- Baking Parchment
Ingredients
- 250 g Self Raising Flour
- 1 teaspoon baking powder
- 2 tablespoons cocoa powder
- 240 ml Buttermilk
- 1 ½ teaspoons Red concentrated gel food colouring
- 120 g butter softened
- 250 g white caster sugar
- 2 medium eggs lightly beaten
- 1 tablespoons Vanilla Extract
- White Chocolate Truffles for decoration
- Freeze dried Raspberries Optional
Cream Cheese Frosting
- 275 g butter at room temperature
- 145 g Icing sugar sieved
- 2 teaspoons vanilla extract
- 450 g full fat cream cheese at room temperature
Instructions
- Preheat the oven to 180 deg fan assisted. Grease and line two 20cm round loose bottomed cake tins.
- Mix together the flour, baking powder and cocoa, then set aside.250 g Self Raising Flour, 1 teaspoon baking powder, 2 tablespoons cocoa powder
- In a sperate bowl, combine the buttermilk with the red colouring and mix thoroughly.240 ml Buttermilk, 1 ½ teaspoons Red concentrated gel food colouring
- Beat together the butter and sugar using a wooden spoon or electric mixer until light and fluffy.120 g butter, 250 g white caster sugar
- Gradually add the lightly beaten eggs, adding a little of the flour mix to help prevent curding. Add the Vanilla extract half the remaining flour mixture and half the red buttermilk and mix together.2 medium eggs, 1 tablespoons Vanilla Extract
- Add the remaining flour and red buttermilk and beat until well combined. At this stage if the colour of the batter is not as deep a red as you would like, add more Gel colouring.
- Divide the mixture between the two tins and spread evenly. Bake in the centre of the oven for 25 – 30mins, or until baked testing the centre of each cake with a skewer until it comes out clean. Leave the cakes to cool for a few minutes before turning out onto a cake rack to cool completely.
Cream Cheese Frosting
- While the cakes are cooling, make the cream cheese frosting. Beat together the butter and icing sugar until light and fluffy, then add the vanilla extract. Mix until well combined.275 g butter, 145 g Icing sugar, 2 teaspoons vanilla extract
- Very lightly mix the cream cheese to loosen it a little, then add to the butter icing mixture. Very gently mix until well combined. Do not overbeat the frosting or it will separate and curdle. Give it the minimum of mixing once you have added the cream cheese.450 g full fat cream cheese
- Once the cakes have cooled completely, slice the two sponge cakes in half horizontally, creating four layers in total.
- Place one layer of sponge onto a plate and cover with a thin layer of frosting. Top with the second sponge layer and cover this with more frosting, then repeat the process.
- Using a palette knife, crumb coat the sides and top of the cake with a thin layer of frosting. Leave to chill in the fridge for about an hour until firm and set.
Finishing touches and Toppings.
- Remove the cake from the fridge, then cover the top and sides with more frosting, finishing with a smooth surface. Add some frosting to a piping bag with a rosette nozzle and decorate the top of the cake with swirls of frosting. Add the white chocolate truffles in the centre. As an optional topping to give a hint of the colour inside, scatter with a few freeze dried Raspberries or Strawberries.White Chocolate Truffles, Freeze dried Raspberries
Your Private Notes
Notes
- Room Temperature: Not ideal to keep the cake out at room temperature, see below.
- Fridge: Because of the cream cheese frosting, this cake is best kept covered in the fridge, where it will keep for several days. The frosting could begin to crack if left uncovered. Tip: Keep a little extra frosting to one side just in case you need to fill in any cracks.
- Freezer: Not suitable for freezing unless the make the sponge cakes ahead of time and freeze the sponge cakes without any frosting. The cream cheese frosting will probably split when thawed.
- Tip 1 - Use full fat cream cheese and do not overbeat the frosting as it could separate and split.
- Tip 2 - Use a large serrated knife to slice the cakes into 4 layers. Make sure they are completely cold before you do.
- Tip 3: Calculate how much frosting you will need to cover the sides and top of the cake before you begin to sandwich the sponge layers together.
Nutrition
Note: Recipes are tested using Metric only. The provided nutrition information is an estimate for the entire recipe, the calorie accuracy nutritional facts, unit and portion conversion are calculated by a third party app. and are not guaranteed.

Leave a Reply